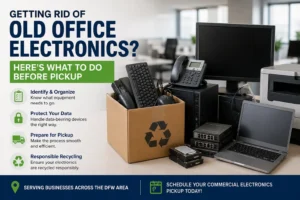

Recycling electronics protects the environment and keeps sensitive data secure. But many Dallas–Fort Worth homes and businesses aren’t sure what to do before handing over old devices. Should you remove hard drives yourself? What about accessories? Do you need to delete files first?
A little preparation makes recycling smoother and keeps your data protected. This guide walks you through each step, whether you have a few old devices at home or a whole office of equipment to retire.
Why Preparation Matters
Data protection
Computers, phones, tablets and even some printers and copiers store personal information, passwords, financial records and business data. Knowing what is on each device helps you decide how it should be handled.
Faster, cleaner processing
Electronics that arrive organized and listed move through recycling faster, and nothing gets overlooked. For businesses, preparation also gives you clear records of what was recycled, when, and how it was handled.
Nothing left behind
Gathering electronics systematically usually turns up more than you expected. A thorough sweep means nothing stays forgotten in storage closets or desk drawers.
Step-by-Step Preparation Guide
Step 1: Inventory your electronics
Walk through your home or office and list everything you plan to recycle:
- Desktop computers and laptops
- Monitors and displays
- Printers, scanners and fax machines
- Keyboards, mice and accessories
- External hard drives and USB drives
- Phones and tablets
- Servers and networking equipment
- Cables, power supplies and chargers
Businesses should check every department. IT closets, storage rooms and individual offices often hold forgotten equipment. An inventory helps plan the pickup, supports asset tracking and makes sure nothing is missed.
Step 2: Back up important data
Before recycling any device, save the files you want to keep to a new computer, an external drive kept separately, cloud storage or a network location. Businesses should confirm backups are complete and open correctly before anything leaves the building. Once a drive is destroyed, the data cannot be recovered.
Step 3: Remove personal items and accessories
Check every device for things you want to keep:
- CDs, DVDs or USB drives left in computers
- Memory cards in cameras or printers
- SIM cards in phones and tablets
- Software license keys on stickers
Decide which cables, adapters and spare parts to keep and which to recycle. Businesses should confirm any licensed software can move to new devices.
Step 4: Record serial numbers and asset tags
Note serial numbers and asset tags before recycling. This supports asset and accounting records, insurance, compliance and tax paperwork. Photos are a quick way to do it. Businesses should update their asset management system to show which equipment is scheduled for disposal.
Step 5: Choose how data will be destroyed
Professional data destruction (recommended). With our hard drive destruction service, drives are physically destroyed so the data can’t be recovered. It saves time and removes the risk of an incomplete wipe.
Doing it yourself. Deleting files or reformatting a drive leaves data recoverable. Proper wiping software takes time and technical know-how. For businesses and anyone with sensitive data, professional destruction is the safer choice.
Step 6: Leave hard drives in, or take them out
Leave them installed. If you use professional data destruction, you can leave drives in place and we remove and destroy them. This is the simplest option for most people.
Remove them yourself. Some people prefer to pull drives first so they can store them securely until destruction. If you do, label them and keep them locked away. Never put hard drives in the regular trash.
Step 7: Group equipment by type
Put computers together, monitors in another spot, printers separately and so on. For larger loads, clear a staging area so everything is in one place on pickup day. Businesses with several locations should use the same process at each site.
Step 8: Keep equipment secure before pickup
Store devices where unauthorized people can’t reach them. This prevents data access, theft of parts, damage, and confusion about which items are going.
Step 9: Plan access for pickup
- Clear paths to the equipment
- Elevator or loading dock access for large items
- Parking or a loading zone for the pickup vehicle
- Someone on site to let the team in
Offices in high-rise or secure buildings should check with building management about access codes, parking and dock reservations.
Tips for Specific Devices
Computers and laptops
- Sign out of all accounts and software
- Disconnect from networks and cloud services
- Remove asset tags you want to keep
Printers and copiers
- Remove paper and check scanners and output trays for documents
- Remove toner or ink cartridges you want to keep
- Remember that many office copiers have an internal hard drive that needs destroying
Phones and tablets
- Remove SIM and memory cards
- Sign out of accounts and turn off activation lock or anti-theft features
Servers and network equipment
- Save any network configurations you need for reference
- Note where removable storage is installed
- Coordinate decommissioning with your IT staff. See our server recycling and networking and telecom recycling pages.
What Not to Do
Don’t try to destroy drives yourself
Drilling, smashing or burning drives is dangerous and often doesn’t work. Metal fragments, dust and fire are real injury risks, and data can survive.
Don’t mix in hazardous waste
Keep chemicals, medical waste, paint, solvents and general trash out of your electronics. They go through different disposal channels.
Don’t put it off
Devices sitting in storage are a security risk and take up space. Once you’ve identified them, schedule the pickup.
Don’t skip the paperwork
Keep a record of what you recycle. It protects you and supports business compliance.
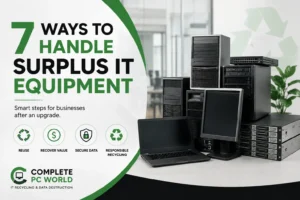
Retiring a whole office of equipment at once? See what to do with surplus IT equipment after an office upgrade.
How CompletePC-World Makes It Easier
You handle the basics: backing up data, removing personal items and grouping equipment. We handle the rest:
- Free business pickup across Dallas–Fort Worth, so there’s no hauling heavy equipment across the metroplex
- A Saturday drop-off in Garland (10 AM–4 PM) for residents, since pickup is for businesses only
- Hard drive destruction, so you don’t need to wipe data yourself
- Careful handling of computers and laptops, monitors and printers and full IT asset disposition projects
One Texas-specific tip: if equipment will sit for a while before pickup, keep it somewhere climate controlled. Summer heat in a garage or storage unit can damage components.
Ready to Recycle?
Good preparation makes electronics recycling quick, secure and simple. Focus on backing up data, organizing equipment and keeping a record of what goes, and leave data destruction to us.
Contact us to schedule your free business pickup anywhere in Dallas–Fort Worth. Residents can bring their devices to our Saturday drop-off at 106 N Shiloh Rd, Garland.